Creamy Mocha Pudding

December 14, 2015

Over the years I’ve made hundreds of desserts, but surprisingly, this is my first batch of homemade pudding ever. Perhaps because instant Jell-O has degraded pudding into something that we, an Americans, never make from scratch anymore. It comes as either a dry box mixed with milk, or in shelf-stable, pre-made little plastic cups.

I had the idea to make chocolate pudding a year ago, when I made this Coffee Flan. Then a few months ago Cook’s Illustrated published an updated pudding recipe (their previous recipe was 15 years old). Today’s pudding is made with real ingredients and is delicious. There are several variations, but I love the addition of Coffee flavor to chocolate. The recipe took under 30 minutes to make (plus 4 hours to cool). 4-stars. Great flavor and texture, without the skin on top that mars my memories of my childhood pudding.

Delicious pudding with 30 minutes of work

Delicious pudding with 30 minutes of work

Later this week I plan to make chocolate mousse with my son, for his high school French class’s Christmas Party. I am saving a bit of the pudding to compare flavors between the two desserts. Obvious the mousse with have a lighter texture.

Comments / Issues:

  1. I don’t have Kahlua, so I skipped substituted an equal amount of Brandy. The brandy worked well to give it some depth, but overall the mocha pudding lacked coffee flavor.
  2. The first time I made this recipe the pudding did not set, because I tried to set it in an ice chest rather than the refrigerator. The 4 hours of setting time in Step 6 must be undisturbed refrigerator time; I would even suggest putting in the bottom shelf of the refrigerator because it is the coldest part.
  3. I tried making this recipe using a round of parchment as specified in the recipe, but it was difficult to measure the correct diameter Instead of parchment I will try plastic wrap (to avoid necessity of measure and cutting.)

Rating: 4-star.
Cost: $5.
How much work? Low.
How big of a mess?  Medium.
Start time 1:30PM. Dinner time 6 PM.
The original Cook’s Illustrated recipe is here.  The recipe as I cooked it today is as follows:

2 teaspoons vanilla extract
1 teaspoon espresso powder
1/2 cup sugar (3-1/2 ounces)
3 tablespoons Dutch-processed cocoa
2 tablespoons cornstarch
1 tablespoon Kahlúa
1/4 teaspoon salt
3 large egg yolks
1/2 cup heavy cream
2-1/4 cups whole milk
1/4 cup brewed coffee
5 tablespoons unsalted butter, cut into 8 pieces
4 ounces bittersweet chocolate, chopped fine

  1. In a very small bowl, mix together vanilla extract and espresso powder; set aside.
  2. In large saucepan, whisk together sugar, cocoa, cornstarch, Kahlúa, and salt. Whisk in yolks and cream until fully incorporated, making sure to use a rubber spatula to scrape corners of saucepan. Whisk in milk and coffee until incorporated.
  3. Set saucepan over medium burner; cook for 8 to 12 minutes, whisking constantly. The mixture needs to be bubbling over its entire surface. Cook for 30 seconds longer, then remove from heat.
  4. Add butter and chocolate to pot. Whisk until melted and becomes fully incorporated.
  5. Remove from burner and whisk in vanilla mixture.
  6. Pour pudding through fine-mesh strainer into bowl. Press lightly greased parchment paper or plastic wrap directly against the surface of pudding. Set on bottom shelf of refrigerator to cool and thicken for at least 4 hours.
  7. Whisk pudding briefly and serve.


Homemade Cracker Jacks

September 25, 2015

While Cracker Jacks are available in every supermarket in America, it only takes a little effort to make homemade. Of course, fresh cooked popcorn taste so much better than popcorn that was popped in a factory 6 months prior. The freshness will become immediately apparent with your first bite. Each box of Cracker Jacks is only 1-ounce, and provides as natural stopping point. The biggest problem is that you will have a hard-time stopping. This recipe yields the equivalent of 28-boxes, so I have learned to break it down into 6 or 7 zip-lock bags. It’s absolutely delicious. 5-stars.

Freshness makes it better

Freshness makes it better

Chris Kimball does have a similar recipe for Butter Toffee Popcorn, but my goal with this recipe was to make something special for my kids (for kids Cracker Jack’s are better than Butter Toffee Popcorn). The main differences are that Chris Kimball calls for 1/2-stick more butter and 1/4-cup less corn syrup. Plus Cracker Jacks include molasses.

Comment:

  1. You can pop your popcorn in any way you want. I prefer to use a hot air popper, since it doesn’t add any oil.
  2. I found it very easy to coat/bake the popped popcorn in a large roasting pan. But you could use anything: a disposable aluminum pan, a large metal bowl, or two cookie sheets.
  3. While I used lightly salted cocktail peanuts, the most Cracker Jack-like peanut is to use Spanish Peanuts (with red skin still intact). I have even used dry-roasted peanuts; but I recommend using lightly salted nuts. Full-salt Planters will taste much saltier than Cracker Jacks; but perhaps a more gourmet balance of sweet to salty.
  4. Cleaning up after making caramel doesn’t have to be difficult. I boil water in the pots and the caramel stuck to the bottom of the pan will eventually dissolve. To clean my roasting pan I set over two burners to boil the water.

Rating: 5-stars.
Cost: $3.75 for 1-3/4 lbs (4-quarts).
How much work? Low/Medium.
How big of a mess? Medium.
Start time 4:00 PM. Ready at 5:15 PM.

Chris Kimball’s original recipe for is here. My descriptions of how I prepared it today are given below:

4 quarts popped popcorn (made from 2/3 cup kernels)
6 tablespoons (3/4 stick) butter
1-1/2 cups brown sugar (7-3/4 ounces)
3/4 cup light corn syrup
3 tablespoons molasses
1/4 teaspoon salt
1 teaspoon pure vanilla
1/2 teaspoon baking soda
1-1/2 cups Spanish peanuts (7-1/2 ounces); I used lightly salted cocktail peanuts

  1. Adjust a rack to the middle of your oven, and preheat to 250-degrees.
  2. Pop the popcorn (my preferred method is with a hot air popper). Grease large roasting pan, and use your hands to evenly spread the popped popcorn in a large roasting pan; leaving behind and discarding any “old maids” (un-and-under-popped kernels). Place in oven until ready to coat in Step 4.
  3. In a 2-quart saucepan, combine butter, brown sugar, corn syrup, molasses and salt. Set over medium burner, bring the mixture to a boil; stirring frequently. Cook for 12 to 14 minutes until the mixture reaches 255-260 degrees; using a cooking thermometer to take the temperature.
  4. Remove the popcorn from the oven. Working quickly, remove from heat and add vanilla extract and baking soda. Mix together and you will see the color change as the baking soda incorporates air into the mixture. As evenly as possible, pour the caramel mixture over the popcorn and toss well to evenly coat all the popcorn (use two heatproof spatulas or wooden spoons; lightly buttered or sprayed with a non stick spray).
  5. Sprinkle with 1-1/2 cups of peanuts; continue to toss until become distributed.
  6. Return roasting pan to 250-degree oven and bake for 45 minutes, stirring well every 15 minutes. Try to evenly coat popcorn and gently break up slightly into smaller pieces.
  7. Allow to cool, and then break into smaller pieces.
  8. Evenly distribute between 6 or 7 zip-lock bags with as much air removed as possible.  Chris Kimball says that it can be stored in an airtight container for 5 days; but it will never last that long.
Your kids will love you even more if you make this for them

Your kids will love you even more if you make this for them


Valentine’s Day Snickers

February 15, 2015

Last year, I made some amazing Valentine’s Day truffles. I pulled out all the stops and created something that I considered unique and amazing. This year, without an official Girl Friend, I almost didn’t make truffles. But I decided at the last-minute to make them, and I made them jointly together with my nearly-16-year-old son, who plans to give some to a friend of his. In a twist this year, I included a recipe that I have been experimenting with for the past 7 or 8 months; homemade Snickers. I know that I am not alone in my love of Snickers.

Delicious Valentine's Day Truffles

Delicious Valentine’s Day Truffles

Snickers are a combination of three different layers; each made separately and layered on-top of each other. First, I made the caramel. Then layered the nouget on top. I froze everything solid so that I could cut them into pieces without squishing the more delicate nougat. Finally topped with chocolate, which importantly makes the sticky middle layers much easier to eat.

Comments:

  1. While I generally love dark chocolate, I didn’t like using exclusively dark chocolate with the taste of Snickers. I achieved a great, rich flavor using 50% dark chocolate and 50% milk chocolate. I used Belgian chocolate from Trader Joe’s ($4.50/lb).
  2. 500 grams of chocolate will cover about 30 truffles.
  3. While I tried a couple of times to make my own marshmallow, it was too delicate a process and I ultimately have changed the recipe to simply buy Marshmallow Fluff. I imagine that I could also use regular marshmallows, melted down, but Marshmallow Fluff works perfectly.
  4. I also considered using homemade dulce de leche instead of caramel; because it is so easy to make. While the texture is perfect, the flavor is slightly different. Ultimately I opted for caramel.
  5. If you are making snickers bars instead of truffle-sized treats, then melt 8 ounces of chocolate and pour over nouget (after the 20 minutes in the refrigerator). This will give a nice even base layer of chocolate. Cut into 2-3/4″-by-1″; yielding 24 bars.
  6. A few of the websites I used when working through this recipe include here and here.

Rating: 4-1/2 stars.
Cost: $12.
How much work? Medium.
How big of a mess?  Medium/High.
Start time: 10:00 AM. Finish time: 6:00 PM.

For the caramel:
1 cup granulated sugar
3/4 cup heavy cream
1/2 cup light corn syrup
4 tablespoons unsalted butter
1/8 teaspoon kosher salt
1/2 cup evaporated milk
8 oz roasted salted peanuts
1/2 teaspoon vanilla extract

  1. Spray a 8″-by-8″ baking pan with cooking spray, then line with a 14″ long piece of parchment paper folded over to match the exact width of the bottom of the pan. Leave a few inches of overhang on each side. Then spray the parchment paper again (never use wax paper). Set aside.
  2. Fit a heavy-bottomed small-sized saucepan with a candy thermometer so that it is near, but not touching the bottom of the pan. Remove thermometer for the time being; only using it for the last few minutes (otherwise your thermometer will overheat).
  3. Add sugar, heavy cream, corn syrup, butter and kosher salt and set over medium-high burner. Stir mixture for 2 minutes until sugar completely dissolves. Use a wet pastry brush to wash down the inside of the pan to eliminate crystallization. Continue to boil , occasionally swirling the pan (but not stirring), and brushing to prevent crystallization, mixture for about 16 minutes until it reaches 260-degrees.
  4. Meanwhile roughly chop peanuts; roughly in half.
  5. Immediately remove the saucepan from heat, add peanuts, evaporated milk, and 1/2 teaspoon vanilla extract. Mix until the peanuts are evenly distributed. Pour caramel mixture into prepared pan using an oiled rubber spatula, spread evenly in the pan. Let cool for 30 minutes until caramel is no longer warm to the touch. Place in freezer until caramel is solid; about 3 hours.
  6. To fully clean the caramel from your pans it may be necessary to re-soften using boiling water.

For the peanut nougat:
3 tablespoons unsalted butter
1/2 cup granulated sugar
3 tablespoons evaporated milk
1 cup marshmallow fluff
3 tablespoons cup peanut butter
1 tsp vanilla extract

  1. Melt butter in a saucepan over medium heat. Add in sugar and milk, stirring until dissolved and bring to a boil; about 1 minute.
  2. Cook for 5 minutes, stirring occasionally. Turn off heat and fold peanut butter until melted.
  3. Fold in fluff, and vanilla extract, stirring until smooth. Pour over bottom layer of caramel and allow to cool completely in refrigerator for 20 minutes. Freeze until solid for 3 hours.
  4. Use a paring knife to run along the sides without parchment. Use parchment sling to remove pan.
  5. Place on a cutting board with the caramel-side down, cut into appropriately sized pieces. Put back in freezer while you prepare the chocolate coating in the next section.

For the chocolate coating:
1-lb milk chocolate
1-lb dark chocolate

  1. Bring a saucepan filled with 2 inches of water to a simmer over high heat; once simmering, turn off heat. Place ALL BUT 6-OZ of chocolate in a dry heat-proof bowl. Set the bowl over the saucepan and stir until chocolate is completely melted and reaches 118°F.; about 10 minutes.
  2. Meanwhile break the remaining chocolate into smallish pieces.
  3. When chocolate reaches 118°F, remove the bowl from the saucepan. Add remaining 6 ounces of chocolate and stir until all chocolate is melted and cools to 100°F. Do not remove the thermometer from the bowl.
  4. Keep the saucepan over low burner. As necessary, return the bowl to the saucepan to maintain the temperature between 95°F and 105°F.
  5. Fill each cup of a mini-cup-cake pan with mini-cup-cake-liners; which will help maintain the form while the chocolate cools.
  6. Spoon chocolate into each empty cup, add one square pushing down so that the chocolate squishes halfway up the sides. Top with another spoonful of chocolate to cover.
  7. Freeze for 5 minutes. Use the tines for a fork to help remove from mini-cup-cake pan. Repeat until your run out of chocolate.

Oreo Birthday Cake

January 28, 2015

Today is my youngest son’s 14-th birthday, so I made this delicious birthday cake based upon his favorite food; Oreo cookies. For the first time ever, our neighbor Dante played happy birthday on the flute to accompany the singing. The cake required a bit of juggling to finish the cake on this workday evening, but the results were fantastic. The base cake was loosely follows Chris Kimball’s recipe, but the frosting was based upon this internet recipe. It used almost an entire package of Oreo cookies (which is now an absurd 14.3 ounces), which gave the cake authentic Oreo flavor. Overall 4-1/2 stars.

Finished Oreo cookie cake

Finished Oreo cookie cake

Comments:

  1. Do not refrigerate the frosting. The results become completely un-spreadable.
  2. If you are going to cut some Oreo cooking in half for topping; use a serrated bread knife so that they don’t crumble.

Rating: 4-1/2 stars.
Cost: $10
How much work? Medium.
How big of a mess?  Medium.
Start time 10 AM. Ready at 12 Noon .

The Cook’s Illustrated link to the original cake recipe is here. But my modified version is below:

Chocolate Cake:
2/3 cup non-alkalized, Hershey’s cocoa
1 tablespoon instant espresso or instant coffee
1-1/2 cup boiling water
1 tablespoon vanilla extract
2 cups all-purpose flour
1-7/8 cup sugar
18 tablespoons unsalted butter
3 large eggs
3/4 teaspoon baking soda
3/4 teaspoon salt

  1. I usually substitute two double espressos (4 ounces, 1/2 cup) and reduce boiling water to 1 cup. Whatever you use, be sure that the total liquid equal 1-1/2 cups.
  2. Bring a pan with water to a boil. In a small bowl, mix together the powdered cocoa and instant coffee; pour in boiling water (and espresso) and mix until smooth. Allow to cool for 15 minutes before stirring in the vanilla.
  3. Pre-heat your oven to 350°  and set an oven rack to the middle position.
  4. Cut two wax paper inserts to fit inside your two 8”x1-1/2” round cake pans. Rub some butter on pan sides and wax paper; lightly flour and tap out an excess.
  5. If your 2-1/2 sticks of butter are not fully softened, microwave them for 30 seconds.
  6. Beat butter in standing mixer equipped with paddle attachment at medium-high speed for 30 seconds; until it becomes smooth and shiny. With the mixer running, gradually sprinkle in sugar and mix for 3 minutes until it becomes fluffy and almost white in color. On at a time, add eggs and mix for 1 full minute after each addition.
  7. In a medium bowl, whisk together flour, baking soda, and salt. With mixer on lowest speed, add about 1/3 of dry ingredients to batter, and immediately add 1/3 of the liquid cocoa mixture. Mix just until the ingredients become nearly incorporated. Repeat flour/cocoa additions twice more.  Turn off mixer and scrape down the sides of the bowl using a rubber spatula. Mix on low-speed for 15 seconds more; the batter will become smooth like satin.
  8. Evenly pour the batter between the two pans. Use a rubber spatula to work the batter to the sides and to smooth the top. Bake cakes at 350° for 25 minutes; until a toothpick comes out with only one or two crumbs. Transfer pans to wire racks, cool for 10 minutes.
  9. Run plastic knife around perimeter of each pan to loosen. Invert cakes onto wire rack, and allow to cool completely before frosting. Remove the wax paper AFTER the cakes have cooled.
  10. Re-invert cake before frosting.

Oreo Frosting Ingredients:
1/3 cup all-purpose flour
1-1/2 cup milk
2 teaspoons vanilla extract
1-1/2 cup butter, softened
1-1/2 cup granulated sugar
1-1/2 cup crushed Oreos (12 Oreo cookies)

  1. Add 1/2 cup flour and 1-1/2 cup cold milk to a small saucepan. Stir and whisk constantly over medium low burner for about 3 minutes until it becomes thick. Remove from heat and put in freeze for 10 minutes until completely cool.
  2. Meanwhile add Oreo cookies to food processor and pulse until evenly crushed, about 10 pulses.
  3. If your butter is not fully softened, microwave them for 30 seconds.
  4. Beat butter in standing mixer equipped with paddle attachment at medium-high speed for 30 seconds; until it becomes smooth and shiny. With the mixer running, gradually sprinkle in sugar and mix for 3 minutes until it becomes fluffy and almost white in color.
  5. Add in vanilla and mix for 30 seconds longer.
  6. Add the thickened milk/flour mixture and mix on low for about 30 seconds. Then turn the standing mixer to high and mix for about 3 minutes, or until the frosting is light and fluffy, much like whipped cream.
  7. Add crushed Oreos and mix for about 30 seconds.

French Apple Tart

December 29, 2014

For me, holiday meals usually involve pulling out all the stops. Usually a week’s worth of planning and cooking. And so it was that I came to make this beautiful Apple Tart for Christmas, one of the most visually stunning desserts that I have ever made. The crust had 10 tablespoons of butter (so it’s got to be good). The tart used 5-pounds of apples, so it was destined to be filled with apple flavor. Inexplicably, against everything my eyes were telling me, I simply didn’t like the tart. Just 2-stars.

Looks like a work of art.

Looks like a work of art.

At first, I thought that the desserts downfall primarily lay in the high visual expectations, coupled with the unpopular applesauce-like consistency of the puree used to hold the slices in place. All of my guests complained about the “applesauce”. But as I more closely examined the recipe I noticed a few ingredients were not part of the recipe. Most notably: sugar. While billed as a “tart”, its did not have any relief of the tartness of the green apples.

Rating: 2-star.
Cost: $12.
How much work? Medium.
How big of a mess? Medium.
Start time: 10:00 AM. End time: 12 PM.

The original Cook’s Illustrated recipe is here. The recipe as I cooked it today is as follows:

Crust Ingredients:
1-1/3 cups all-purpose flour (6 2/3 ounces)
5 tablespoons sugar (2 1/4 ounces)
1/2 teaspoon salt
10 tablespoons unsalted butter, melted

  1. Put butter in a small sauce over low heat and allow to slowly melt; about 5 minutes. Also, set an oven rack to lowest position and another rack 5″-to-6″ from broiler element. Pre-heat the oven to 350 degrees.
  2. Whisk together the flour, sugar, and salt together in a medium bowl.
  3. Add melted butter and stir with stiff rubber spatula or wooden spoon until a dough forms.
  4. Using your hands, press two-thirds of dough into bottom of 9-inch tart pan with removable bottom. Press remaining dough into fluted sides of pan.
  5. Press and smooth dough with your hands to even thickness.
  6. Place pan on wire rack set in rimmed baking sheet and bake on lowest rack, until crust is deep golden brown and firm to touch, 30 to 35 minutes, rotating pan halfway through baking. Set aside until ready to fill.

10 Golden Delicious apples (8 ounces each)
3 Tablespoons unsalted butter
1 Tablespoon water
1/2 cup apricot preserves
1/4 teaspoon salt

  1. Peel and core 5 apples (remaining 5 will be used later). Cut lengthwise into quarters and cut each quarter lengthwise into 4 slices.
  2. Set 12″ skillet over medium heat and melt 1 tablespoon butter.
  3. Add apple slices and 1 Tablespoon water and toss to combine. Cover and cook, stirring occasionally, until apples begin to turn translucent and are slightly pliable, 3 to 5 minutes.
  4. Meanwhile, microwave apricot preserves for 30 seconds until they become fluid. Strain preserves through a fine-mesh strainer reserving the solids. Set aside 3 tablespoons of the strained preserves for brushing tart (most will be used for making the applesauce).
  5. Transfer apples to large plate, spread into single layer, and set aside to cool. Do not clean out the skillet.
  6. Peel and core the remaining 5 apples and slice into 1/2″-thick wedges. Melt 2 tablespoons butter in skillet over medium burner. Add the strained preserve, apricot solids, apple wedges and 1/4 teaspoon salt. Cover with lid and cook for 10 minutes; stirring a few times until the apples become very soft.
  7. Use a potato masher to mash into a puree and continue to cook for another 5 minutes until it has reduced to 2 cups.
  8. Put puree into baked tart shell and smooth. Select 5 or 6 of the thinnest sauteed apples to use in the center.
  9. Start at the outer edge of the tart, arrange slices in concentric circles, offsetting each circle so that the slices don’t line up. It will create the flower-like pattern. Use the thin, reserved slices to fit into the center.
  10. Bake at350 degrees for 30 minutes (still on the wire rack in sheet pan).
  11. Remove from oven and pre-heat broiler. Water the 3 tablespoons of preserve from Step 4 in microwave for 20 seconds. Evenly brust over the entire surfact of the apples, but avoiding the crust.
  12. Broil for 1 to 4 minutes until the apples are attractively browned. Allow tart to cool for 1-1/2 hours before removing from tart pan and serving.

Coffee Latin Flan

December 6, 2014

Flan is baked custard, usually served with caramel sauce. The first time I had ever heard of it was in 1995, when my neighbor asked a woman who I was dating at the time if she knew how to make Flan.  “Of course”, she said, “Flan Royal”. Wow, not mere flan for commoners, but Royal Flan. I thought she was a “keeper”. But it turned out that Royal was just a brand of Jell-O; most Latin Americans do not make flan from scratch, much in the way we (as a country) no longer make chocolate pudding. (Note to self: make chocolate pudding.)

Wow, easily impress your friends

Wow, easily impress your friends

The Flan was truly impressive, but I was a little nervous that it would release properly and the caramel would be thick and fluid. I could not have asked for anything more. I liked the addition of espresso powder as it made the flan more interesting. The flan is very potent and this yields enough to serve a large crowd. 4-1/2 stars.

Comments:

  1. For me the caramel cooking times were all considerably longer than specified in the recipe. The most critical thing was that I continued until I saw the reddish-amber hues specified in Step 3.
  2. Because my cooking times were noticeably longer when making the caramel, I used 3 tablespoons of water instead of 2 tablespoons specified in the recipe. My fear was that more of the water had an opportunity to evaporate and that the caramel might completely seize up in my loaf pan. The final consistency was perfect.
  3. I would recommend making your caramel in a stainless steel clad pot. I made mine in a Calphalon (anodized aluminum) pan, and it was difficult to see the color of the caramel to judge its readiness. The good news is that the reddish-amber color was easily spotted.
  4. Chris Kimball also has a variation using almonds (which uses 1 teaspoon almond extract in lieu of espresso powder). Or for a regular flan just omit the espresso powder.

Rating: 4-1/2 star.
Cost: $3.50.
How much work? Medium/High.
How big of a mess?  Low.
Start time: 1 PM. End time: 4 PM. (for serving the following day)

The original Cook’s Illustrated recipe is here.  The recipe as I cooked it today is as follows:

Resulted in less caramel than I thought

Resulted in less caramel than I thought

2/3 cup sugar (4-2/3 ounces)
2 large eggs plus 5 large yolks
14-ounce can sweetened condensed milk
12-ounce can evaporated milk
1/2 cup whole milk
1-1/2 tablespoons vanilla extract
4 teaspoons instant espresso powder
1/2 teaspoon salt

  1. In a medium-sized saucepan, add 2/3 cup sugar and 1/4 cup water. Mix until sugar is completely wet.
  2. Put pan over medium-high burner and bring up to a boil (4 to 5 minutes). Cook without stirring for 2 to 3 minutes until it becomes golden brown. Gently swirl pan and continue to cook for another 2 minutes until it becomes the color of peanut butter.
  3. Remove for burner and swirl the pan until the mixture turns red-amber, about 15 to 20 seconds. Carefully add 2 tablespoons warm tap water, which will bubble a steam, and swirl until it becomes incorporated.
  4. Empty caramel into an 8-1/2″ x 4-1/2″ loaf pan (mine was 9″x5″). Do not scrape out saucepan, only allow the liquid to pour by itself. Set loaf pan aside.
  5. Set a rack to the middle of your oven and pre-heat to 300-degrees. Fold a dish towel so that it will evenly fit in a 13″x9″ Pyrex baking dish, and set aside. Bring two quarts of water to a boil.
  6. Meanwhile in a large bowl, whisk together eggs and yolks. Add  sweetened condensed milk, evaporated milk, whole milk, vanilla extract, espresso powder, and salt. Whisk until combined.
  7. Pour mixture through a fine-mesh strainer into the loaf pan containing the caramel. Use aluminum foil to tightly cover loaf pan and set in baking dish ontop of dish towel. Put in oven and carefully add the two quarts of boiling water into Pyrex baking dish.
  8. Bake for 1-1/4 to 1-1/2 hours until the custard reaches 180-degrees. The center of the custard will still jiggle slightly. Remove foil and allow to completely cool in the water bath; about 1 hour.
  9. Once cool, remove from water bath and tightly cover using plastic wrap. Refrigerate overnight of from up to 4 days.
  10. When you are ready to unmold the flan, use a paring knife to slide around and loosed the edges. Invert serving plate ontop of loaf pan, flip over. After it releases, you can use a rubber spatula to scrape and remaining caramel onto the flan.
  11. Slice and serve, and any leftovers can be loosely covered and refrigerated for up to 4 days.

Homemade Chocolate Syrup

November 21, 2014

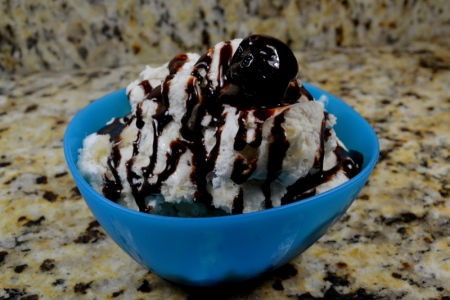
I’m in the middle of my Thanksgiving preparations and don’t really have time to figure out how to make homemade chocolate syrup. But I have a few good reasons why I made time. First, my squeeze bottle of Hershey’s “Genuine Chocolate Flavored” syrup has been empty for a couple of weeks, and I feel bad because my son has been eating ice cream that clearly needed chocolate syrup. Second and more important, I had examined the ingredient list (in an effort to answer the question: what does “Genuine Chocolate Flavor” really mean?), and was very disappointed with Hershey’s choice of ingredients. It’s as if they had purposefully tried to use the worst possible ingredients. The first two ingredients are: (1) high fructose corn syrup, and (2) corn syrup. Really, using just regular corn syrup was too difficult. This homemade recipe uses regular sugar, and I omitted the other chemicals and artificial flavors. Finally, instead of using real vanilla Hersey’s uses “Vanillin”, so they are obviously using imitation vanilla made from a wood pulp waste product.

Delicious Ice Cream definitely needs chocolate syrup

Delicious Ice Cream definitely needs chocolate syrup

Comments:

  1. Hershey’s isn’t tricking us by calling it “Genuine Chocolate Flavor”, as I had assumed. Chocolate includes both Cocoa powder and Cocoa butter, whereas chocolate syrup includes only cocoa powder. It is a non-fat product (a good thing) and thus by excluding the Cocoa butter, Hershey’s cannot call it Chocolate. Hence the phrase “Genuine Chocolate Flavor”.
  2. Many people suggest using Dutch-processed cocoa, but I just used whatever I had in my kitchen, which was Hersey’s. Hershey’s is natural cocoa powder; not Dutch processed.
  3. This recipe yields 18-ounces of chocolate syrup. I re-used the same Hershey’s syrup squeeze bottle, but eventually I imagine that I will just use a regular squeeze bottle. Also you can use regular mason jars.
  4. The recipe continues to be non-fat, which means that there is no cocoa butter in any of the ingredients. That could change depending up what type of cocoa powder you use.

Rating: 4-star.
Cost: $1.15 for 18-ounces of syrup.
How much work? Low.
How big of a mess?  Low.
Start time 5 PM. Dinner time 5:10 PM.

While Chris Kimball does have a recipe to make chocolate syrup, I wanted a replacement for Hershey’s that has a stable shelf life. Chris Kimball uses dairy (heavy cream and butter) which means that it must be used within a short period of time. Today’s recipe is based upon Alton Brown’s cocoa syrup recipe.

1 cups water
1-1/3 cups sugar
1/4 teaspoon kosher salt
2 tablespoons light corn syrup
1 cups cocoa powder (2-5/8 ounces)
2 teaspoons vanilla extract
  1. Mix sugar, water, corn syrup, and kosher salt in medium-sized pot and bring up to a boil. Whisk in cocoa powder and continue mixing until it is dissolved. Boil for 1 minute, and remove from burner.
  2. Stir in vanilla extract. Allow to cool to room temperature. You can either strain into squeeze bottles: in case you have a lot of solids that could plug up your bottle.
  3. Store in refrigerator. While the recipe will appear to be too runny, it will thicken when it cools to refrigerator temperature.

Chocolate Chip Cookies

October 29, 2014

A couple of years ago Chris Kimball came up with a variation on the classic Toll-house chocolate chip cookies. He called them “Perfect”. I first made them in 2010, and while I loved them I hardly considered them perfect. In the ensuing years, I’ve adjusted the recipe to my family’s desire for a classic chocolate chip cookie, backing away from some of Chris Kimball’s changes. For example, I’ve stopped browning the butter. The resulting nuttiness made the cookies taste delicious, but made them into something other than a classic chocolate chip cookie. I still melt the butter, because it makes the dough so easy to mix.

I added back 1/3-cup flour for thicker cookies (on the left)

I added back 1/3-to-1/2-cup flour for thicker cookies (on the left)

The other major change, I added back an extra 1/3 to 1/2-cup of flour. The original Toll House recipe calls for 2-1/4 cups flour. Chris Kimball’s original idea was to make larger, thinner cookies. See the photos for the side-by-side difference. While to cookies were fine on the first day, the flatter cookies get stale faster. Much to my children’s chagrin, I don’t let them eat them all in one day.

Comments:

  1. The recipe calls for 10-oz of chocolate chips, they are always sold in 12-oz bags. You can either save the 1/4-cup of chocolate chips (which will never go to waste) or add them to the cookies. My kids have NEVER complained, “Dad, these cookies have too many chocolate chips”.
  2. Chris Kimball’s original recipe called for 1-3/4 cups flour, in case you wanted to give it a try. All the other ingredients listed below are unchanged.
  3. For High-Altitude the cookies may spread too much in the oven. Chris Kimball says to use less sugar, increase oven temperature and decrease baking time.
  4. If you think that the cookies are too dry, Chris Kimball recommends adding an extra egg yolk.

Rating: 4-stars.
Cost: $3.50 for 16 large cookies.
How much work? Low.
How big of a mess?  Small/Medium.
Start time 2:00 PM. Snack time 3:00 PM.

The Cook’s Illustrated original recipe is here.  The recipe as I cooked it today is as follows:

2-1/4 cups unbleached all-purpose flour (10-ounces)
1/2 teaspoon baking soda
14 tablespoons unsalted butter (1-3/4 sticks)
1/2 cup granulated sugar (3-1/2 ounces)
3/4 cups packed dark brown sugar (5-1/4 ounces)
1 teaspoon table salt
2 teaspoons vanilla extract
1 large egg
1 large egg yolk
1-1/4 cups semisweet chocolate chips or chunks (10-ounces)

  1. Set a rack to middle of your oven and pre-heat oven 375-degrees. Cut parchment to match the size of two 18″x12″ baking sheets.
  2. In a medium bowl, combine flour and baking soda, whisk briefly and set aside.
  3. Set 10″ skillet over medium-high burner and melt 10 tablespoons of butter (leaving 4 tablespoons butter) for about 2 minutes. If desired, continue cooking and swirling skillet constantly for between 1 to 3 minutes until the butter becomes dark golden brown and smells nutty. Remove from burner and empty into a large heatproof bowl, adding 4 more tablespoons of butter into hot butter and stir until completely melted.
  4. Add granulated and brown sugar, 1 teaspoon salt, and 2 teaspoons vanilla to the bowl with the melted butter. Whisk until it becomes fully incorporated. Add 1 egg and extra yolk; whisk for about 30 seconds until it becomes smooth and there are no lumps of sugar. Allow to sit for 3 minutes, then whisk for 30 seconds. Repeat the resting and whisking process 2 more times until mixture becomes thick, smooth, and shiny.
  5. Stir in flour mixture with a stiff rubber spatula or wooden spoon for 1 minute, until it just combines. Stir in chocolate chips until evenly distributed and ensuring that no flour pockets remain.
  6. Divide dough into 16 portions, each portion is about 3 tablespoons (or you can use #24 cookie scoop). Arrange 2″ apart on parchment-lined baking sheets (you will have 8 dough balls per sheet unless you are using smaller baking sheets, which will require 3 batches).
  7. Bake them 1 tray at a time for between 10 to 14 minutes, rotating the baking sheet 180-degrees half way through cooking. The cookies will be done when they become golden brown; the edges will begin to set but the centers will still be soft.
  8. Allow cookies to cook on a wire rack. Chris Kimball says to allow the to cool completely before serving (lol. Like that’s going to happen)
While thicker and softer, the same weight looks smaller

While thicker and softer, the same weight looks smaller


Homemade Pumpkin Puree

October 17, 2014

One unshakable truisms in the kitchen is “that fresh is always better than canned”. While those ubiquitous Libby’s can say “100% pumpkin” and are seductively easy to use, its slight off flavor has always made me want to roast my own pumpkin. In past years, I’ve read that I need to find “sugar pumpkins” (whatever those are), which are 8-to-10″ in diameter and have a darker orange exterior compared to jack-o’-lantern pumpkins. Hmm. Is that really all I’ve got to go on? And the difference is important: Sugar pumpkin have more flavorful and denser flesh. They are drier, and thus take less time to cook.

IMPORTANT HALLOWEEN TIP. How to prevent squirrels from eating your pumpkins.

After paying extra attention this year, I did finally notice that a few markets are properly labeling them as “sugar pumpkins” or “pie pumpkins”. In my case, I found a 5-3/4 pound sugar pumpkin, which yielded 2 pounds of pumpkin puree. That’s enough to make two pies, and only required about 15 minutes of work (over the course of nearly 3 hours).

BTW, I am planning to use the same Pumpkin Pie recipe that I’ve used for the past 3 years. Based upon a simple tasting of the pumpkin puree, the flavors are much deeper and more flavorful. I’m sure that this will make for a 5-star pumpkin pie!

Comments:

  1. The pumpkin puree should be used within 4 days or frozen in an air-tight container (with parchment paper pressed onto the surface of the pumpkin) for up to 2 months.
  2. I did try to roast the pumpkin seeds, but didn’t pay close enough attention as they baked in the same hot oven as the pumpkin. They overcooked, but fortunately didn’t burn, which could have ruined the pumpkin puree.

Cost: $2.50.
How much work? Low.
How big of a mess?  Medium.
Start time: 2:00 PM. Done at: 4:45 PM.

The Cook’s Illustrated original recipe is here. The recipe as I cooked it today is as follows:

1 small sugar pumpkin

  1. Set a rack to the middle of your oven and preheat to 375-degrees.
  2. Cut pumpkin in half from top to bottom. Remove the seeds and pulp. Line a rimmed-backing sheet with parchment paper, and set pumpkin halves with the cut-side downwards.
  3. Roast for 45 to 60 minutes until the flesh can be easily pierced with a skewer. Flip the pumpkin over and roast for 30 minutes more.
  4. Scoop flesh from skin into a food processor, process until smooth. Unless you have a full-sized food processor, you will need to process one half at a time (i.e. in two batches).
  5. Drain the puree in a fine-mesh strainer, set over a bowl for 1 hour. Mine lost about 6 ounces of water.
  6. To test consistency, pack some of your puree into a small drinking glass and unmold it onto a plate. It should slump gently toward base but otherwise hold its shape. Loosen as necessary with drained liquid, or return puree to strainer and continue to drain it if it is too loose.
  7. Measure out puree into two 16-oz containers before freezing. A typical Libby’s can weighs 15-ounces.
  8. When you use cook with it, you should use it exactly as your would canned pumpkin.

Cookie Dough Ice Cream

July 9, 2014

I poured my heart into making my son a wonderful chocolate/coffee cookie-dough ice cream cake for his 15th birthday, but the regular cookie dough recipe turned much too hard when frozen. I have since experimented with a lot of different tricks and techniques, and am pleased to be able to offer some insight. I cut the flour down to 1 cup, and also tried to substitute liquids that remain softer when frozen; I omitted the egg whites, and used heavy cream which has less water. Also, I substituted vegetable oil in lieu of some butter to keep things soft. The butter that I did use, I browned to compensate for the substitution. The mini-chocolate chips also made the dough seem softer. The result is very good both in terms of texture and flavor. 4-stars, still a little room for refinements of the cookie dough.

Vanilla-bean, Cookie-Dough Ice cream cake

Vanilla-bean, Cookie-Dough Ice cream cake

The problem with using regular cookie dough is that it is meant to withstand the high-heat of an oven and then served either warm or at room temperature. When frozen, it becomes rock hard.

Comment:

  1. Be sure to use unsalted butter or the recipe will be too salty. If you must use salted butter, cut the salt down to 1/4 teaspoon.
  2. I used many of Chris Kimball’s techniques found here, but adapted them for the freezer.

Rating: 4 stars.
Cost: $10
How much work? Low/Medium.
How big of a mess?  Low/Medium.
Start time: 12:00. Dinner time: 5:00

Chris Kimball’s original recipe is here. The descriptions of how I prepared it today are given below:

8 tablespoons unsalted butter (1 stick)
1/3 cup vegetable oil
1 cup packed dark brown sugar (6-1/2 ounces)
1/2 teaspoon table salt
2 teaspoons vanilla extract
1/4 cup heavy cream or milk
2 large egg yolk
1 cups unbleached all-purpose flour (5 ounces)
1 cups semisweet mini- chocolate chips (6 ounces)

  1. Melt the stick of butter in 10” skillet over medium-high burner for 2 minutes, and continue cooking butter for about 4 more minutes, swirling pan constantly, until the butter becomes dark golden brown and has nutty aroma. Empty browned butter to large heatproof bowl using a heatproof spatula. Stir 1/4 cup vegetable oil into hot butter.
  2. Add brown sugar, salt, and vanilla to bowl with butter and whisk until fully incorporated.
  3. Add egg yolk and heavy cream. Whisk for 30 seconds until the mixture becomes smooth with no sugar lumps remaining. Let mixture stand 3 minutes, then whisk for 30 seconds. Repeat process of resting and whisking 2 more times until mixture is thick, smooth, and shiny. Using rubber spatula or wooden spoon, stir in flour mixture until just combined, about 1 minute. Stir in chocolate chips giving dough final stir to ensure no flour pockets remain.

Vanilla Bean Ice Cream:
1-1/4 cups of 2% milk.
1-3/4 cup heavy cream.
1/2 cup plus 2 tablespoons sugar.
1/3 cup light corn syrup.
1/4 teaspoon salt.
6 egg yolks.
1 vanilla bean.
2 teaspoon vanilla extract.

  1. Prepare a large bowl of ice water; to be used as an ice bath after removing milk from stove-top. Place metal sheet pan in freezer.
  2. Add milk, heavy cream, about half the sugar (1/4 cup plus 2 tablespoons), 1/3 cup corn syrup and 1/4 teaspoon salt to a medium saucepan. Use a paring knife to cut the vanilla bean in half lengthwise, then use the back of the knife to scrape out vanilla seeds (caviar). Add both the caviar and the empty stalks to the saucepan.
  3. Warm over medium burner for 5 minutes until the mixture reaches 160°; stir occasionally to ensure that the sugar completely dissolves. Temporarily remove pan from heat to prevent the milk from boiling.
  4. Meanwhile in a small bowl, beat the yolks together with 1/4 cup sugar.  Never let your yolks/sugar sit for more than a few minutes. Temper the yolks by whisking in 1/2 cup of the 160° milk/cream. Then whisk in a second 1/2 cup to further temper.
  5. Add the milk/yolk mixture back in with the milk in the saucepan. Cook over medium burner until the mixture reaches 180°; stir constantly with heat-proof spatula. Cooking too long will scramble your eggs.
  6. While the mixture heats up, wash your medium bowl and place it in ice batch.
  7. When the mixture reaches 180°, immediately strain your mixture through a fine-meshed strainer into the medium bowl (discarding empty vanilla pods). The ice batch will allow the mixture to cool in about 30 minutes; stirring occasionally will help. Then place the bowl in freezer for about 1/2 hour to 1 hour to further reduce the temperature. The mixture will begin to freeze along the sides of the bowl, which you should scrape down to further reduce the temperature.
  8. Add mix into the ice cream machine’s canister. Churn for 30 minutes, or per manufacturer’s instruction.
  9. If making a cake, line your sheet pan with plastic wrap and lay ice cream in a roughly even layer. Cover with plastic wrap and freeze for 1 hour. After an hour, use a rolling pin to work into an even layer. Freeze for at least 2 more hours before serving.
Cookie-Dough as a middle layer

Cookie-Dough as a middle layer