Broccoli-Cheese Soup

April 8, 2016

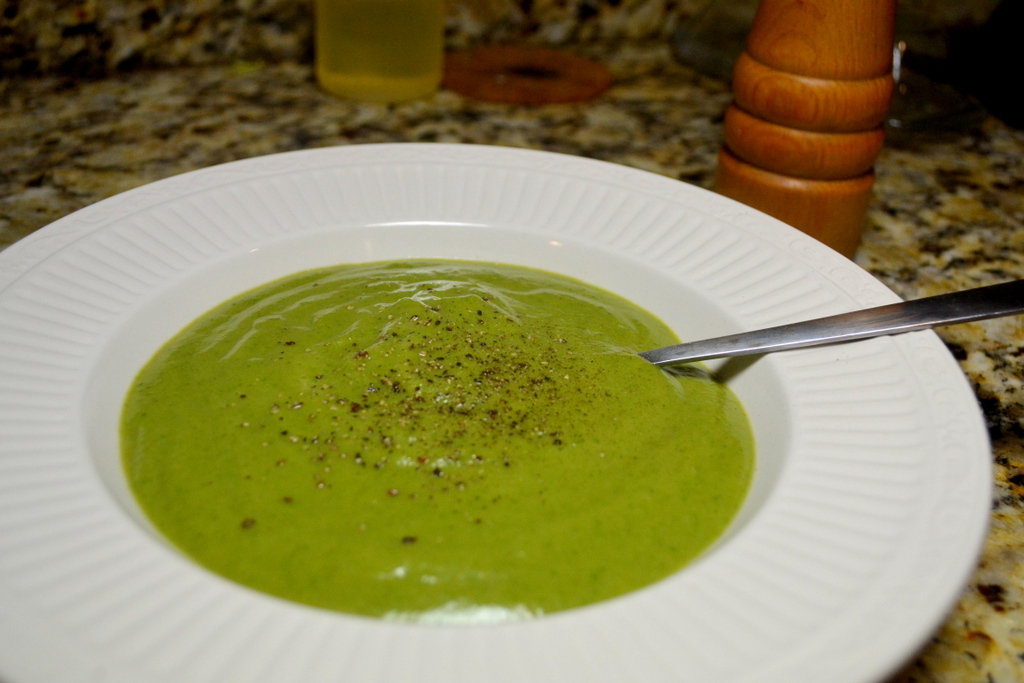
I first made this soup last October, but came across a few technical issues which I have corrected when I made this soup again over the weekend. In fact, I loved it so much that I made a second batch the next day. The soup is very flavorful, and uses baby spinach to amplify the broccoli flavor (and color). The recipe uses sharp cheeses (sharp cheddar and parmesan) to attain great cheesy flavor, but without so much cheese as to make the soup feel heavy or fat laden. I splurged a little and bought a sharp English cheddar, but since it only added a few dollars because the recipe just needs 3-ounces. Overall the recipe is delicious; 4-1/2 stars.

Delicious soup has been great for the cold weather

Delicious soup has been great for the cold weather

I was hoping to stretch the soup throughout the week (for lunches), and was a little surprised that the recipe only yields 4 bowls of soup. So I made a second batch yesterday, still having enough baby spinach and sharp English cheddar to make the second batch. I only need to buy another 2-1/2 pounds of broccoli.

  1. The recipe calls for peeling the stalks; which was laborious when I first made this recipe in October. This time I only spend a few minutes peeling the stalks before breaking into 1-inch pieces. It saved nearly 30 minutes.
  2. The original recipe calls for something between 3 to 4 cups of water (in addition to the 2 cups of chicken broth); adjusting the amount of water in the final step according to your desired consistency. I would suggest adding at least 1 cup; and if you are planning to reheat, to add 1-1/2 cups of water.
  3. Because the soup was so thick, there was a lot of soup left in the blender after Step 5. To recover some of the lost soup, I blender the final cup of water (added as part of Step 6); which rinsed out most of the leftover soup, before adding the water to the pot.
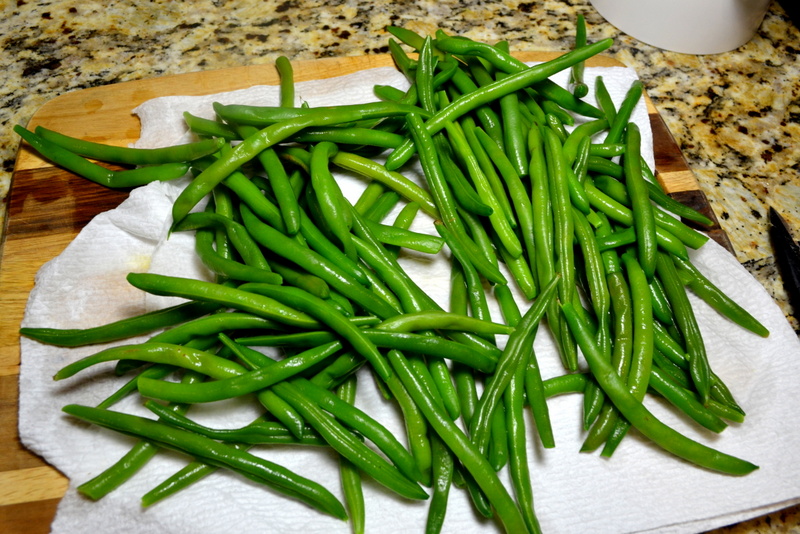
  4. I bought an extra 1/2 pound of broccoli, because some of the stalks were very long and I wanted to trim away the very thick and hard portion. Besides, it was only sale for only 99-cents/pound.
  5. I did not quite have enough dry mustard powder for the second batch, so I used the following substitution rule: 1 teaspoon dried mustard = 1 Tablespoon prepared mustard.

Rating: 4-1/2 stars.
Cost: $7.
How much work? Medium.
How big of a mess? Medium.
Start time 5:00 PM. Ready at 5:45 PM.

Chris Kimball’s original recipe is here. My descriptions of how I prepared it today are given below:

2 pounds broccoli (I used 1lb 10 oz florets, plus 6 ounces of stalks)
1 medium, roughly chopped onion (1 cup)
2 tablespoons unsalted butter
2 medium garlic cloves, pressed (2 teaspoons)
1-1/2 teaspoons dry mustard powder
pinch cayenne pepper
1 teaspoon table salt
3–4 cups water
1/4 teaspoon baking soda
2 cups chicken broth
2-oz baby spinach (2 cups)
3-oz sharp cheddar cheese, shredded (3/4 cup)
1-1/2 oz Parmesan cheese, grated fine (about 3/4 cup)
1/2 teaspoons ground black pepper

  1. Prepare broccoli by roughly chopped florets into 1-inch pieces, trim the stems, then peeled and cut into 1/4″-thick slices. Prepare onions by roughly chopped which should yield about 1 cup.
  2. Add butter to large Dutch oven set over medium-high burner. After the foaming subsides, add the prepared broccoli, onion. Press the garlic cloves directly into the pot. Add 1-1/2 teaspoons dry mustard powder, a pinch of cayenne pepper, and 1 teaspoon table salt.
  3. Cook for 6 minutes, stir frequently. After the pot becomes fragrant, add 1 cup water and 1/4 teaspoon baking soda. Bring water up to a simmer, cover, and reduce burner to maintain a simmer, and continue cooking for 20 more minutes until broccoli becomes very soft, stir once half way through cooking.
  4. Add 2 cups chicken broth and 2 cups water. Turn up burner to medium-high. Once pot is at a simmer, stir in baby spinach and wilt for 1 minute. Remove pot from burner.
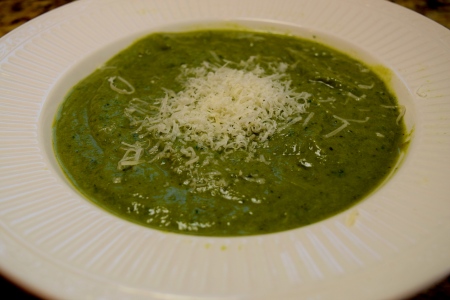
  5. Put half of soup in blender, add shredded cheddar and grated Parmesan, and process for 1 minute until smooth.Empty into a medium-sized bowl and repeat this step with the remaining soup.
  6. Empty bowl of soup back into the Dutch oven, set over medium burner until begins to simmer. Add up to 1 cup of water until you attain the desired consistency (if you have a lot of leftover soup in blender; rinse blender first with the 1 cup of water, before adding it back to the pot). Adjust seasoning with salt and 1/2 teaspoon pepper according to taste. Serve, with extra Parmesan passed separately.

Asparagus with Lemon-Shallot Vinaigrette

November 8, 2015

I served this as a side-dish to a wonderful French meal (see Boeuf à la mode, Onion Soup). While the asparagus was naturally tasty, the sauce mostly fell off and left plain asparagus. As I think the recipe needs to be judged on whether or not it enhances it’s deliciousness, as written, I can give the recipe only 3-stars. However, you will not be unhappy with the end results.Who doesn’t love broiled asparagus?

More delicious than the 3-stars indicate

More delicious than the 3-stars indicate

Comments:

  1. Over the years Chris Kimball has flip-flopped on calling for thick versus thin asparagus. This recipe dating from 2001 calls for thin asparagus. Later in 2012, Chris Kimball said that thick asparagus are better for the broiler. Way back in 1993 she said that steamed are better than boiled. In any case, I followed the recipe as it was written and used thin asparagus.
  2. You should always snap off the tough ends when cooking asparagus. Chris Kimball says to hold the asparagus halfway down the stalk; then with the other hand, holding the cut end between the thumb and index finger about 1″ from the bottom; bend the stalk until it snaps. Each stalk will break in a different place depending upon how tough the stalk is.

Rating: 3-stars.
Cost: $8.50.
How much work? Low.
How big of a mess? Low.
Started: 5:40 pm  Ready:  6:00 pm.

Chris Kimball’s original recipe is here.  The descriptions of how I prepared the soup today are given below:

2 pounds thin asparagus spears (2 bunches)
1 tablespoon olive oil
Salt and ground black pepper
1 large shallot, minced (about 2 tablespoons)
1 tablespoon lemon juice
1 teaspoon grated lemon zest
1 tablespoon minced fresh thyme leaves
1/4 teaspoon Dijon mustard
1/3 cup extra-virgin olive oil

  1. Adjust oven rack so that it is 4 to 5″ from broiler element. Pre-heat broiler.
  2. Line a heavy rimmed baking sheet with aluminum foil. Lay out the asparagus and drizzle with 1 tablespoon olive oil, sprinkle with salt and pepper. Toss until evenly coated and lay out into a single layer.
  3. Broil for 8 to 10 minutes until lightly browned; shaking the pan halfway through cooking so that they cook evenly.
  4. Allow to cool for 5 minutes and arrange on a serving platter.
  5. While the asparagus cools, add shallot, lemon juice and zest, thyme, mustard, and olive oil in small bowl. Whisk and season to taste with salt and pepper. Drizzle over asparagus and serve immediately.

Broccoli-Cheese Soup

October 8, 2015

The chilly mornings have gotten me in the mood for soup (after a long summer soup hiatus). So I made a batch of this Broccoli-Cheese Soup. Preparing the broccoli took me almost 30 minutes; mostly because the recipe asks me to peel the stalks. However, I am now wondering if I misunderstood the extent to which the recipe requires me to peel the stalks (further discussed under issues section below). What I believe is an error in the original recipe, makes me believe that I overcooked the broccoli (See Issue #1 below). The overcooking gave the broccoli a slightly off taste. I can only give the soup 3-1/2 stars; though the soup has potential and I will try again.

Prep the broccoli took 30 minutes

Prep the broccoli took 30 minutes

Comments:

  1. There was an error in the original recipe (I believe that Chris Kimball wanted me to reduce burner from medium-high so as to maintain a simmer; not the full boil over medium-high burner). In Step 6, the recipe says to “increase heat to medium-high”; but it was already on high from Step 2. I overcooked my broccoli; giving it a slightly off flavor.
  2. Peeling the Stalks. The recipe simply says: “stems trimmed, peeled, and cut into 1/4-inch-thick slices.” Unfortunately the instructions were unclear. I wasn’t understanding if I had to break each stalk of the main trunk and peeling each branch individually. This was a lot of work! I would recommend leaving the entire stalk as one piece and only peel away the outer skin that is accessible.
  3. When trimming the stalk; discard any leaves or blemishes. I would also recommend slicing off the bottom inch of the stem. Slice the remaining stem into the 1/4-inch disks.
  4. When removing the crowns, slice straight through the broccoli stem as close to the crown as you can get.

Rating: 3-1/2 stars.
Cost: $8.
How much work? Medium.
How big of a mess? Medium.
Start time 5:00 PM. Ready at 6:15 PM.

Chris Kimball’s original recipe for is here. My descriptions of how I prepared it today are given below:

2 tablespoons unsalted butter
2 pounds broccoli
1 medium onion, roughly chopped (about 1 cup)
2 medium garlic cloves, minced or pressed through garlic press (about 2 teaspoons)
1-1/2 teaspoons dry mustard powder
pinch cayenne pepper
Table salt
3–4 cups water
1/4 teaspoon baking soda
2 cups low-sodium chicken broth
2-ounces baby spinach (2 loosely packed cups)
3-ounces sharp cheddar cheese, shredded (3/4 cup)
1-1/2 ounces Parmesan cheese, grated fine (about 3/4 cup), plus extra for serving
Ground black pepper

  1. Prepare the broccoli by removing the florets and roughly chopping into 1″-pieces. Trim away and leaves and remove the bottom inch of the stem. Peel the stalk and cut into 1/4″-thick slices. Also roughly chop 1 onion.
  2. Set a large Dutch oven over medium-high burner. Add butter and when the foaming subsides, add broccoli (florets and stems), chopped onion, pressed garlic, dry mustard, pinch of cayenne, and 1 teaspoon salt.
  3. Cook for 6 minutes; stirring frequently.
  4. Add 1 cup water and 1/4 teaspoon baking soda. Bring liquid up to a simmer, cover with lid, and cook from 20 minutes until the broccoli becomes very soft. Stir once during cooking.
  5. While the broccoli cooks; grate your cheeses.
  6. Add 2 cups chicken broth and 2 cups water. Increase burner to medium-high.
  7. Once the soup begins to simmer, stir in spinach and cook for 1 minute until wilted.
  8. Carefully empty half of soup into jar of a blender (I used a bowl with a lip in order to spill less), add cheddar and Parmesan to blender. Process for 1 minute until smooth. Empty soup from blender to medium bowl (or pot if empty). Repeat the blender with the remaining soup.
  9. Return soup to Dutch oven and set over medium burner. Bring up to a simmer. Adjust the consistency of soup with up to 1 cup of water. Adjust seasoning with salt and pepper according to taste.
  10. Serve, passing extra grated parmesan separately.

Grilled Corn with Flavored Butter

July 7, 2015

Fresh off my success with the Corn Chowder, I made this grilled corn-on-the-cob for my 4th of July barbecue (which I actually had of the 5th). The technique is pretty straight-forward; grill the corn for a few minutes over direct heat, then finish cooking the corn in a pan as it soaks up herb butter. The barbecue was a delicious success, and included Garlic-Lime Grilled Pork Tenderloin Steaks, grilled beef ribs with a Chimichurri (which I will post later in the week), and potato salad. The corn was 3-1/2 stars; good, but not that far out of the ordinary.

Fourth of July barbeque

Fourth of July barbecue

Comments:

  1. My grill was full of meat (as you can see below), so there was not a lot of free space on the grill to dedicate to the disposable aluminum roasting pan called for in Chris Kimball’s original recipe; he says to use a disposable aluminum pan at least 2-3/4″ in depth. However, to save space on my grill I wrapped the ears together in a heavy-duty foil packet.
  2. There are quite a few recipes for different varieties on flavored butter on the website: Honey butter, Latin-Spiced butter, New Orleans “Barbecue” butter, and Spicy Old Bay butter.

Rating: 3-1/2 star.
Cost: $2
How much work? Low.
How big of a mess?  Low.
Started: 5:00.  Ready:  5:45.

Chris Kimball’s original recipe for grilled corn is here, and the recipe for the basil and lemon butter is here. The descriptions of how I prepared them today are given below:

Flavored Butter Ingredients:
6 tablespoons unsalted butter
2 tablespoons minced fresh basil
1 tablespoon minced fresh parsley
1 teaspoon finely grated lemon zest
1/2 teaspoon salt
1/4 teaspoon pepper

  1. Allow butter to soften on the counter-top, or microwave for 20 seconds to soften. Combine all ingredients in small bowl, and mix together.

Grilled Corn on the Cob Ingredients:
13″x9″ disposable aluminum roasting pan
8 ears corn
2 tablespoons vegetable oil
Salt and pepper

  1. Ignite a full chimney starter filled with charcoal and create a two-zone fire, depending upon your needs for the main course.
  2. If you have the space on the grill, add flavored butter to disposable pan. Set butter/pan aside until Step 4.
  3. Remove husk and silk from corn. Evenly brush corn with vegetable oil and sprinkle with salt and pepper. Grill corn over hot hide of the grill for between 5 and 9 minutes; rotating as necessary so that all sides are lightly charred.
  4. Move corn to disposable pan and tightly cover with aluminum foil. Set pan over hot side of grill and cook for 3 minutes until the butter is sizzling; shaking frequently. Remove from grill, and open foil away from you to allow the steam to escape.
  5. Serve, spooning extra butter over the individual ears.

Modern Succotash with Poblano, Bacon, and Cilantro

June 8, 2015

Of course I’ve heard of succotash, but it wasn’t until the latest issue of Cook’s Illustrated that I really knew what it was; a corn and bean side dish. While Chris Kimball published this basic recipe (using butter beans); I made a variation that included bacon, poblano and cilantro. It was very quick and easy to make; almost all the effort was in preparing the vegetables. I was surprised at how delicious this simple side dish was; both my two sons loved it. The flavors were fresh, and rest of the flavors offered great depth. 4-1/2 stars.

I never knew what succotash was; until current issue of Cook's Illustrated

I never knew what succotash was; until current issue of Cook’s Illustrated

Comments:

  1. Chris Kimball warns against using frozen or canned corn in this dish. After tasting the dish, I see how important the freshness is to the success of the recipe. While I agree, that also means that this is a very seasonal dish. I read that it is traditionally served around thanksgiving in New England; a time of year when there is no fresh corn.

Rating: 4-stars.
Cost: $5.
How much work? Low/Medium.
How big of a mess? Low/Medium.
Start: 5:30 PM. End time: 6:00 PM.

The original Cook’s Illustrated recipe is here. The recipe as I cooked it today is as follows:

15-oz can pinto beans, reserving 2 tablespoons liquid
2 teaspoons lime juice
2 slices bacon
2 tablespoons unsalted butter
1 small onion
1/2 poblano chile
Salt and pepper
2 garlic cloves
1/4 teaspoon ground coriander
3 cups kernels cut from 4 ears corn
2 tablespoons minced fresh cilantro

  1. In a small bowl, mix together 2 tablespoons of liquid from beans with the 2 teaspoons lime juice. Set aside. Rinse the rinse beans and drain in a colander. Cut off kernels from ears of corn, and set aside with rinsed beans. Finely chop your onion, and cut your 1/2 poblano into 1/4″ pieces. Peel and mince your two garlic cloves.
  2. Chop bacon and cook in a 12″ non-stick skillet over medium-high burner for 5 to 7 minutes. Once crispy, use a slotted spoon to remove bacon to a paper-towel lines plate and set aside.
  3. Add 2 tablespoons butter to skillet with the bacon fat, add chopped onion, diced poblano, and 1/2 teaspoon salt to skillet. Saute vegetables for 4 to 5 minutes under they begin to brown. Add minced garlic and 1/4 teaspoon ground coriander; cook for 30 seconds.
  4. Turn down burner to medium; add corn kernels and rinsed beans. Cook for 4 minutes; until corn and beans have cooked. Add bean liquid/lime mixture and cook for 1 minute.
  5. Remove skillet from burner; mix in minced cilantro and adjust salt and pepper according to your taste. Sprinkle with crispy bacon and serve.

DSC_0002-002


Blanched Green Beans with Rosemary-Thyme Aioli

January 13, 2015

I made these blanched green beans as a “make ahead” time saver, but found that making them ahead didn’t actually save any time. In the time it took to re-heat them just before dinner, I could have just as easily made them from scratch. The good news is that the green beans were good, perfectly cooked. The aioli was quite potent; a little goes a long way. Even though I made 2 pounds of green beans, I still used less than half of the aioli. Overall, the combination was 3-1/2 star. Slightly better than my daily green beans.

Delicious, but not sure I need a recipe

Delicious, but not sure I need a recipe

Comments:

  1. Chris Kimball goes against his own cooking recommendations. He says that older, tougher green beans (such as those sold in supermarkets most of the year) are best when roasted. The roasting promotes the conversion of starches to sugars, which improves the flavor.

Rating: 3-1/2 stars.
Cost: $3.
How much work? Low.
How big of a mess? Low/Medium.
Start time 5:00 PM. Finish time 5:30 PM.

Chris Kimball’s original recipe is here. The Aioli recipe is here. The descriptions of how I prepared this today are given below:

Green Beans Ingredients:
2 1/2 quarts water
1 teaspoon table salt
1 pound green beans, stem ends snapped off

  1. Prepare the green beans by washing and then cutting off both ends (see photos below). The easiest way is to take a push a bunch of green beans against the blade of the knife so that they are perfectly in line, then slice of the tips all in one cut.
  2. Add 2-1/2 quarts water to large saucepan and bring to a boil over high burner.
  3. Add 1 teaspoon salt and green beans, return to boil which will take about 2 minutes. Boil for another 3 to 4 minutes until the beans become bright green and crisp-tender. Meanwhile, fill large bowl with ice water.
  4. Drain beans into colander and the immediately into the ice water.
  5. After 2 minutes the beans no longer feel warm to touch. Again drain in colander then completely dry using paper towels. Put beans in a  gallon-sized zip-lock bag. Seal and refrigerate until ready to use. They will keep up to 3 days.

Rosemary-Thyme Aioli Ingredients:
1 medium clove garlic
1 teaspoon chopped fresh rosemary
1 teaspoon chopped fresh thyme leaves
2 large egg yolks
1 tablespoon lemon juice, plus 1 teaspoon
1/8 teaspoon sugar
1/4 teaspoon table salt
1/8 teaspoon ground white pepper, or black if white is unavailable
3/4 cup olive oil (or 50% extra-virgin olive oil and 50% vegetable oil).

  1. Peel and press garlic through garlic press (alternatively you can grate very finely on rasp-grater). Measure out 1 teaspoon garlic, discarding any remaining garlic. Add to the bowl of food processor.
  2. Chop rosemary and thyme and add to food processor. Add egg yolks, lemon juice, sugar, salt, and pepper. Process for 10 seconds until combined.
  3. With food processor running, gradually add oil in slow steady stream (which will take about 30 seconds). Scrape down the sides of bowl with rubber spatula and process for another 5 seconds.
  4. Adjust seasoning with additional salt and pepper, and serve.
Rosemary-thyme ailoi

Rosemary-thyme ailoi


Pommes Anna

December 31, 2014

I made these decorative potatoes as part of my wonderful holiday meal. While they look beautiful, a quick glance at the ingredient list reveals that they are just a prettier version of plain, old potatoes. No surprises whatsoever. The slow-cooking in the skillet on the stove-top gives them a nice crust. The carmelization adds nice flavor. 3-1/2 stars, the texture of my top layer was a little over-done. Next time I will reduce the stove-top cooking to 25-minutes.

Beautiful dish, but really just regular potatoes.

Beautiful dish, but really just regular potatoes.

Chris Kimball warns against slicing the potatoes until you are ready to start assembling. I’m not sure what the consequences are, but thought that it was important to pass along. I had contemplating to peel and slice them ahead of time to save time on the day of my massive meal.

Rating: 3-1/2 stars.
Cost: $2.50.
How much work? Low.
How big of a mess? Low/Medium.
Start time: 4:45 PM. End time: 5 PM.

The original Cook’s Illustrated recipe is here. The recipe as I cooked it today is as follows:

3-lbs russet potatoes (you can also use Yukon Gold or white potatoes)
5 tablespoons unsalted butter
1/4 cup vegetable or peanut oil
Salt and ground black pepper

  1. Use a vegetable peeler to peel your potatoes. Also melt the 5 tablespoons of butter; either in the microwave or in a 10″ non-stick skillet (wipes and used again in Step 3). Set a rack to the lower-middle of your oven and pre-heat to 450-degrees.
  2. Use the slicing attachment on your food processor to slice your potatoes into 1/16″-to-1/8″-thick slices. Empty into a large bowl with melted butter, and use your hands to toss until potatoes are evenly coated.
  3. Add 1/4 cup vegetable oil to a clean, 10″ heavy-bottomed, non-stick, oven-proof skillet. Swirl to evenly coat the skillet. Set a kitchen timer of 30 minutes, and put the skillet over medium-low burner.
  4. Use the nicest slices to form the bottom layer. Start arranging by placing one slice on center the skillet. Continue by overlapping more slices in a circle around the center slice. Continue to form the next outer circle of overlapping slices. Your first layer should consist of 3 or 4 rows of overlapping potatoes until the entire bottom of the skillet is covered with potatoes. Evenly sprinkle each layer with a scant 1/4 teaspoon salt and pinch of ground black pepper.
  5. Arrange the second layer of potatoes by working in the opposite direction of the first layer; evenly sprinkling each layer with a scant 1/4 teaspoon salt and pinch of ground black pepper. Continue repeating the layering of potatoes, switching directions with each layer, and sprinkling with salt and pepper, until you have used all the potato slices. You can piece together broken or uneven slices to form a single piece. When you are done, the potatoes will mound in the center of the skillet.
  6. Continue cooking until the 30-minute timer you set in Step 3 has beeped (if you are unsure about the correct setting of medium-low, check after 25 minutes. Use the bottom of a 9″ cake pan to press down firmly to compact the potatoes. Use a lid to cover the skillet and bake in oven for 15 minutes. Uncover and continue to bake for 10 more minutes. Test the doneness of potatoes using a paring knife.
  7. Line a rimless cookie sheet (or the bottom side of a sheet pan) with aluminum foil, and lightly spray with non-stick cooking spray.
  8. Hold potatoes in place using the back of the cake pan, titling skillet, drain off and discard any excess oil.
  9. Put foil-lined sheet on top of skillet, wearing oven mitts, flip over and remove skillet. Carefully slide potatoes into serving platter. Serve by cutting into wedges.

Slow-Cooked Whole Carrots with Pine Nut Relish

December 16, 2014

My kids usually prefer their carrots whole and raw, but they tried this recipe and didn’t like either the slow-cooked carrots or the Pine Nut Relish.  As an adult, the carrots were tender and evenly cooked. The relish was delicious, though something tasted slightly off. I couldn’t put my finger on exactly what it was. 1-1/2 hours was a long time to dedicate to a side-dish, but it was more clock time than hands-on cooking time. Because of kids reaction and long cooking time, I doubt that I will make this recipe again. 3-1/2 stars.

DSC_0020

Comments:

  1. The preparation of the parchment lid was a bit difficult to understand, but Chris Kimball’s website had a detailed diagram. Also, I included a picture of the end result.
  2. I didn’t do a perfect job peeling the carrots, and small pieces of peel that remained turned dark and unattractive. I don’t think it affected the taste, but the presentation suffered.
  3. The original recipe calls for leaving the carrots whole, but I cut them in half length-wise just before serving.
  4. Chriss Kimball does have a few other relishes to try; Green Olive and Golden Raisin Relish, Onion-Balsamic Relish with Mint, Red Pepper and Almond Relish.

Rating: 3-1/2 star.
Cost: $6.50.
How much work? Medium.
How big of a mess? Low/Medium.
Start time: 4:30 PM. End time: 6 PM.

The original Cook’s Illustrated recipe is here, and the relish recipe is here. The recipe as I cooked it today is as follows:

Slow-Cooked Carrots Ingredients:
3 cups water
1 tablespoon unsalted butter
1/2 teaspoon salt
12 carrots (1-1/2 to 1-3/4 pounds)

  1. Prepare you parchment lid by folding 12″-square piece of parchment into quarters creating a 6″-square. Fold the bottom-right corner over to meet the top-left corner; creating a triangle. Fold one more time; right to left; creating a narrower triangle. Cut off 1/4″ of the tip of the triangle (opening a small hole in the center). Measure 5″ from the hole along both edges and cut straight across. (See photo below). Open up paper.
  2. Peel carrots. Put 12″-skillet over high burner; add 3 cups water, 1 tablespoon butter, 1/2 teaspoon salt. Bring up to a simmer, then remove skillet from burner. Add carrots in a single layer, placing parchment round on top of carrots. Then put a regular skillet cover on top of everything; allowing to stand for 20 minutes.
  3. Remove the lid, but leave the parchment, place over high burner until simmering. Reduce burner to medium/low and simmer for 45-minutes until almost all the water has evaporated. The carrots will be very tender.
  4. Throw away the parchment. Increase burner to medium/high and continue cooking carrots for 2 to 4 minutes; shaking pan frequently; until they are lightly glazed and there is no more water.

Pine Nut Relish Ingredients:
1/3 cup pine nuts
1 shallot
1 tablespoon sherry vinegar
1 tablespoon minced fresh parsley
1 teaspoon honey
1/2 teaspoon minced fresh rosemary
1/4 teaspoon smoked paprika
1/4 teaspoon salt
Pinch cayenne pepper

  1. Toast the pine nuts in the 12″ skillet before starting the carrots. Pine nuts will burn easily, so shake the pan frequently during toasting process. After toasting, set them aside until the carrots are 5-minutes remaining in Step 3.
  2. Mince shallot, parsley and rosemary. Combine all ingredients in bowl. Serve on top of carrots.

Ceviche

November 13, 2014

Ceviche is one of my favorite things about visiting the Caribbean (see here, here, here, here, here, here and here). Of course, ceviche is “cooked” in citrus juice rather than being thermally cooked. While its important to understand the potential risks about eating “raw” seafood (see here), I personally have never allowed the slight risks from stopping me from enjoying ceviche. I rely on my judgement to select the right restaurant (not-to-cheap-price, cleanliness). I’ve also made something similar but gently cooking the shrimp.

Delicious, but heavy on the veggies

Delicious ceviche, but a little too heavy on the veggies

Frozen seafood cannot match the flavor and texture of fresh, Caribbean seafood, but it still work making at home. This version has more peppers and vegetables that I generally get in the Caribbean. It is more like a citrus seafood salad. It is still delicious. 4-stars. I served it with this Pernil.

Issues:

  1. After waiting the 1 hour listed in my recipe, the ceviche still looked semi-raw. I wanted to wait until the entire exterior lost it’s brown, translucent appearance. Finally after 3 hours the shrimp appeared completely cooked.
  2. I exclusively used shrimp, but the recipe is written to also work with sea scallops, skinless fish fillets, or any combination. I believe that it would be important to cut them in very similar sized pieces, so that they will finish “cooking” at the same time.

Rating: 4 stars.
Cost: $12.
How much work? Medium.
How big of a mess?  Medium.
Start time: 2:30 PM. Ready at: 6:00 PM.

The original Cook’s Illustrated recipe is here.  The recipe as I cooked it today is as follows:

1 pound extra-large shrimp (21 to 25 per pound)
1 teaspoon grated lime zest from 1 lime
1/2 cup juice from 4 limes
1/2 cup juice from 4 lemons
1 small red bell pepper, stemmed, seeded, and chopped fine
1 jalapeño chile (small), stemmed, seeded, and minced
1 medium garlic clove, minced or pressed through a garlic press (about 1 teaspoon)
Salt
1/4 cup extra-virgin olive oil
4 scallions, sliced thin
3 tablespoons minced fresh cilantro leaves
1/2 teaspoon sugar
Ground black pepper

  1. If using shrimp, peel them completely, devein (if not already done), and use a paring knife to slice each shrimp in half lengthwise  (through the deveined groove in the shrimps back).
  2. If using scallops, remove the side tendon and cut into 1/3″-thick rounds.
  3. If using fish, remove any bones and cut into 1″ squares that are 1/3″-thick.
  4. Add the lime zest, lime juice, lemon juice, bell pepper, jalapeño, garlic, and 1/2 teaspoon salt to a medium bowl. Stir until combined.
  5. Gently stir in the seafood, and cover with plastic wrap. Refrigerate for 60 minutes (it took mine 3 hours) until the seafood becomes firm, opaque, and it appears cooked. Stir halfway through the marinating time.
  6. Drain the mixture though a fine-mesh strainer, discarding the liquid. Leave it a little wet, and return to the bowl.
  7. Gently stir in the oil, scallions, cilantro, and sugar. Season with salt and pepper to taste before serving.

Garlic-Parmesan Mashed Potatoes

October 20, 2014

In the past, I’ve added cheese to mashed potatoes (see here and here), and the results have always been creamy and delicious. But today’s potatoes didn’t seem creamy enough for my taste, and the garlic seemed a little too raw (I realize a certain amount of that rawness was Chris Kimball’s goal).  I preferred the Aligot. I made these Garlic-Parm mashed potatoes as part of a mid-October turkey breast dinner. (I didn’t publish an update to the Turkey because there were no real changes from the last time). I rate these potatoes 3-1/2 stars; delicious, but the texture wasn’t as cream as I like, and the garlic overpowered the Parmesan.

Part of a delicious turkey dinner

Part of a delicious turkey dinner

Interestingly, Cooks Country published a similar recipe sans garlic. Comparing the two, I understand why the Asiago substitution isn’t necessary in today’s recipe (because the garlic would have overpowered any subtleties introduced by the inclusion of two kinds of cheese). The main other difference is that the butter, milk/cream, and cheese are treated differently. The Cook’s Country recipe claims that warming the 3 dairy in the same skillet will result in a silkier texture; which might have addressed one of my complaints about today’s recipe.

Comments:

  1. I used New Jersey potatoes, which are similar to the “Eastern Potatoes” that I often use. They appear to have similar starch levels to Yukon Gold potatoes, but have a much whiter appearance.
  2. This is the first recipe I’ve made from the new Nov/Dec 2014 issue.

Rating: 3-1/2 stars.
Cost: $4.50.
How much work? Low.
How big of a mess?  Low/Medium.
Start time 4:45 PM. Dinner time 5:00 PM.

The Cook’s Illustrated original recipe is here. The recipe as I cooked it today is as follows:

2-lbs Yukon Gold potatoes (I used Jersey potatoes)
1/2 teaspoon garlic powder
4 tablespoons unsalted butter
1-1/4 teaspoons garlic (added in two parts)
1-1/2 ounces Parmesan cheese, grated (3/4 cup)
1-1/4 teaspoons Salt
1/2 teaspoon pepper
2/3 cup warm whole milk

  1.  Peel your potatoes and slice them into 1/2″-thick slices. Put potatoes in large saucepan and cover by 1-inch of cold water. Put saucepan over medium-high burner, and bring up to a simmer. Adjust your burner to that you maintain a gentle simmer for between 18 to 22 minutes, until a paring knife inserted in the center of potatoes meets no resistance. Drain potatoes into a strainer.
  2. While potatoes cook, combine garlic powder and 1/2 teaspoon water in small bowl. Mince the garlic until it turns into a paste. Cut butter into 4 pieces and add to an 8″ skillet. Place over medium-low burner until melted. Add 1 teaspoon garlic paste and 1/2 teaspoon garlic powder mixture; cook for 1 minute, stirring constantly, until it becomes slightly golden. Empty the butter mixture into medium serving bowl. Add grated Parmesan, 1-1/4 teaspoons salt, 1/2 teaspoon pepper, and remaining 1/4 teaspoon garlic paste. (You can use the residual heat of the 8″ skillet to gently warm your 2/3 cup whole milk)
  3. Put the now-empty saucepan over low burner. With the ricer or food mill over the saucepan, work in batches to process the potatoes. Using a rubber spatula to stir in butter-Parmesan until it becomes incorporated. Stir in warm milk until incorporated.
  4. Put into medium serving bowl. Adjust salt and pepper according to your taste, and serve immediately.